Gluten Free Beer?


 (This Article is a 3 Minute Read)

   
Before you went gluten free were you a beer drinker? I was. I love beer! In fact, my husband and I were really into quality craft beers and were always on the search for something new. We even tried our hand at home brew. After I went gluten free he kept the hobby going – so I jealously look upon his array of options hoping and wishing someone would take gluten free beer to a quality craft level.   

Improving my health meant letting go of happiness. Ok maybe that is overstating things a bit, but I did hang my head low when I was told regular beer was out.  Knowing all of this, my Natural Health Practitioner recommended I try RedBridge. It is a gluten free beer put out by Anheuser-Busch. I found that it was a good option for a light tasting beer. It’s also good for making tempura recipes. However, since I was in the market for a more complex taste, it wasn’t really satisfying. I rather have nothing than drink it.
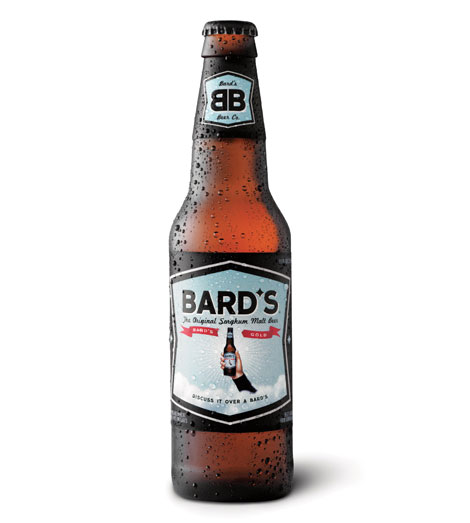

 That was a few years ago and now there are many options. My favorite is Bard’sIt is made from ingredients that work well with my diet and the taste and color are really satisfying. The one thing I noticed is that if I have more than one within a 24 hour period, I get a headache. I need to investigate that, but I highly recommend trying it.


New Planet has several types of brews. I’ve tried the ones I could, but I didn’t care for the taste. However, if in your pre-gluten free life you liked IPA beers, you may like these.

For me the list is more limited because I do not eat rice or oats - so beers made with these ingredients are off my list. Also I do not like fruit flavors in my beer. I keep trying them and it’s just not working for me.  

I do however, like hard ciders.  Even though I don’t drink these regularly, many restaurants have them on the menu and they are a good option - especially when everyone else at the table is drinking enviable drafts.

A Thought on Gluten Removed Beers

Some say that these are not truly gluten free. Therefore, they aren’t good options if you suffer from Celiacs or are gluten intolerant. If you are gluten free because you just want to be, then you might be able to get away with drinking these occasionally. 

I have many more brews to try out there. Local availability makes this a bit challenging – but don’t worry – I will keep working at it. Until next time no need to give up beer totally - you can now have it gluten free!


The Pulled Muscle...

My husband strained his latissimus dorsi while working. It got to the point that he couldn’t perform his job properly and had to go to urgent care for help.


At urgent care the doctor gave him two prescriptions: an anti-inflammatory pain reliever Naproxen, and what I would consider an obnoxious amount of prednisone steroid. Due to my chronic illness I have experience with taking Prednisone and was very wary of him taking it and at the dosage prescribed.

I expressed my concerns and he chose to take the pain reliever but not the steroid.

As soon as he called and told me what was going on, I immediately put together a protocol to get him healed up and back in the action. Here is what we did:

-Applied an Essential Oil blend of Frankincense, Spruce, Rosewood and Blue Tansy to feet and to the lower back pain site.

- Acupressure to the following points: B60, B62, B47, B23, B48, B54, GB41, Lv3


- Applied Ice to the area for 20 minutes

At this point he was mobile and feeling much better. He said he could feel himself relaxing and the pain leaving out of the area.

-Drank Apple Kuzu about 1 hour before going to bed.

The next day we repeated this protocol and added:

- Epsom salts full body bath

By the third day, he was up and going. He returned to work after that with minimal soreness.

By integrating conventional treatment with at-home therapies, the recovery time was much shorter than any of his previous injuries.

Pictures courtesy of Bigstock Photos & Acupressure's Potent Points


Why go through the work?

On a good day I have many health challenges. Some have asked me: “Why do you go through so much trouble to make your food homemade?”


This is a good question considering that now-a-days there is much more awareness of the gluten free lifestyle. The only issue is that many of the things you can purchase pre-made are made with grain flours like rice flour, or potato starch – I cannot have that either.


Then there is sugar! It always amazes me that a company would go through the effort of making a gluten free product and then put regular chemically processed sugar in it. I really don’t understand that one.


Anyway, when I make things at home, it allows me to control the ingredients. It is worth the effort to eat something that tastes amazingly delicious and also have the confidence that I will not suffer for it.


What really helps to make cooking gluten free (and sugar free) do-able and enjoyable is learning different techniques of great cooks and having the right tools. I find that techniques and tools can be learned by watching conventional cooking shows and then just apply them to your favorite recipes. Another good reference is the additional information provided in most gluten free cook books – especially when it comes to baking.


Also, the more you do it – the easier it gets. And then there is the money you save. I guess I could go on and on…

Make Baking Easy

One of my best baking tools:
Parchment Paper


It is a must have for any kind of baking
especially gluten free. 

I line baking sheets with it and it 
FREE!-ly releases my carefully made baked goods with ease.

CAUTION: Use good quality parchment paper. 

I once found a great deal on it at a dollar store. When I went to remove my carefully homemade gluten free pizza from the pan...the paper stuck to the back and made the pizza inedible.  

The lesson? 

Don’t skimp on it. The best brands so far that I’ve used are Reynolds – both regular parchment paper and parchment on one side/ foil on the other (this is good for holding shape) and Sam’s Club’s Member’s Mark parchment paper. 

With these you don’t need to grease or flour the paper, simply put your baking creations on it and bake away.

Another advantage: it makes rolling out pie crust and pizza dough so easy and stress free. It’s a worthwhile addition to any kitchen and I would be very reluctant to bake without it.

*Just a little FYI: Parchment Paper - NOT - Wax Paper 


Gluten Free Beer?


 (This Article is a 3 Minute Read)

   
Before you went gluten free were you a beer drinker? I was. I love beer! In fact, my husband and I were really into quality craft beers and were always on the search for something new. We even tried our hand at home brew. After I went gluten free he kept the hobby going – so I jealously look upon his array of options hoping and wishing someone would take gluten free beer to a quality craft level.   

Improving my health meant letting go of happiness. Ok maybe that is overstating things a bit, but I did hang my head low when I was told regular beer was out.  Knowing all of this, my Natural Health Practitioner recommended I try RedBridge. It is a gluten free beer put out by Anheuser-Busch. I found that it was a good option for a light tasting beer. It’s also good for making tempura recipes. However, since I was in the market for a more complex taste, it wasn’t really satisfying. I rather have nothing than drink it.


 That was a few years ago and now there are many options. My favorite is Bard’sIt is made from ingredients that work well with my diet and the taste and color are really satisfying. The one thing I noticed is that if I have more than one within a 24 hour period, I get a headache. I need to investigate that, but I highly recommend trying it.


New Planet has several types of brews. I’ve tried the ones I could, but I didn’t care for the taste. However, if in your pre-gluten free life you liked IPA beers, you may like these.

For me the list is more limited because I do not eat rice or oats - so beers made with these ingredients are off my list. Also I do not like fruit flavors in my beer. I keep trying them and it’s just not working for me.  

I do however, like hard ciders.  Even though I don’t drink these regularly, many restaurants have them on the menu and they are a good option - especially when everyone else at the table is drinking enviable drafts.

A Thought on Gluten Removed Beers

Some say that these are not truly gluten free. Therefore, they aren’t good options if you suffer from Celiacs or are gluten intolerant. If you are gluten free because you just want to be, then you might be able to get away with drinking these occasionally. 

I have many more brews to try out there. Local availability makes this a bit challenging – but don’t worry – I will keep working at it. Until next time no need to give up beer totally - you can now have it gluten free!


Healing Gluten Damage Part 2

(This article is a 3 Minute Read)

As discussed in part 1, if you have suffered from a gluten allergy, your digestive system needs to be brought back to optimal health. The damage done to the intestines is very intense. Simply removing the allergy will not provide the relief you need, nor will it allow you to feel healthy again. Part 1 explained that bone broth is a great way to heal the intestinal lining. Repairing the bacterial flora in the gut is essential.

With all of the damage inflammation has done to your gut, the bacterial flora is off balance. Unfortunately it doesn’t take much to allow the bad bacteria to take over. The great news is that it is relatively easy to bring it back in balance! Taking a good probiotic of 10-50 billion live cultures per capsule is the way to get it done. This will also assist in healing the intestinal lining.


Aside from taking a probiotic capsule everyday, you can also include fermented vegetables in your daily diet. Organic sauerkraut or kimchi is a tasty and great way to get even more good bacteria into your gut. Be sure to get really good quality, organic versions though, not the ones you typically find in your average grocery store. Recipes for the homemade versions will be coming soon. Look out for more great ways to get back to feeling good again.

Limoncello Cookies


Limoncello Cookies

Another converted cookie recipe!  


 What is it about the lemon that is so attractive? 


My theory is that lemons contain all of the 

essences of the sun that we love.


They are refreshing, cleansing, and 

delicious - imparting a feel of wellness 

and energy. 


Fluffy pillows of lemony sweetness dance 

across your taste buds when you have one 

of my Limoncello Cookies. These cookies 

are light while at the same time rich. 


Oh and by the way, did I mention they are 

GLUTEN FREE! 


It always amazes me how uncompromisingly 

delicious gluten free baking can be, when done right. 


Without further ado here is the recipe:


Ingredients:

2 -Sticks (4oz.) of Butter Soft
1 1/2 cup Sugar
1 tsp Vanilla
2 Eggs
2 tsp Lemon Zest
2 Tbs Lemon Juice

1 cup Gluten Free All Purpose Flour
1 cup Tapioca Starch
1 cup Cornstarch
1/2 tsp Salt
1/2 tsp Baking Powder
1/4 tsp Baking Soda
3/4 tsp Xanthan Gum 

Directions:


Cream butter and sugar together.
Add eggs and stir or whip until fluffy

Add in vanilla, lemon zest & juice.
Stir in dry ingredients
 Line baking sheet with parchment paper. 
Add teaspoons of dough about 1 1/2 inch apart. 
Bake at 350 degrees for 9 to 11 minutes. 


Healing Gluten Damage Part 1

So you’ve gone gluten free and you feel much better. That’s great! But did you know that the allergy to gluten became apparent to you because of the damage it was doing to your gut? Unfortunately it can’t be healed just by going gluten free.

However, there are therapies that can bring your gut back to optimal health. One easy therapy is taking bone broth. Taking it several times a day on an empty stomach will repair the lining of the gut. It will make it strong and close up any perforations created by the gluten protein. 

Once your gut is healed, one cup of bone broth a day will keep you in good shape. You will be able to absorb nutrients and prevent the inflammatory response.

How to get it:

I always recommend making things yourself and this broth is no exception. The one thing you want to make sure of is to use organic chicken or beef bones. You can buy it ready made online, however, it is costly and is sold in small amounts. Bone broths offered in supermarkets usually contain harmful ingredients.  Click here for the super easy bone broth recipe. 

Making Recipes Gluten Free: Cookies


Most of us that have gone gluten free are making an effort to improve our health. This means that for the most part we are eating clean and healthy whole foods. Occasionally, though, we do have a hankering for something rich, sweet, and yummy. Also if we have little ones, we can keep them on track by providing the yummy things they see their friends enjoying.

Making goodies like cookies from scratch is actually very beneficial to having a healthy diet. In fact making most things from scratch is healthful because you can control the ingredients. This includes controlling the quality of ingredients, where they come from, and how they come to you.

Unfortunately many of the recipes readily available for the gluten free diet tend to have odd ingredients and at times, do not produce a desirable goodie that will satisfy the occasional sweet tooth. Also the variety of recipes can be scarce at times.

However, there are a multitude of recipes out there for non gluten free diets. The ability to convert these recipes into a more healthful, gluten free option will add exponentially to your repertoire.

One of the easiest sweets to make from scratch is cookies. There are a few basic things to keep in mind when converting. The “flour” used is the most important consideration. While coconut flour and other healthy flours are desirable, these can sabotage a recipe because they have a high protein and fiber content. So it is important to be careful when using these. Most of the time you can incorporate these flours successfully if you blend them with a starch. Another option for a healthy flour is Bob’s Red Mill Gluten Free All Purpose Flour. Now just to be clear, this brand makes a baking flour blend. I do not use this because it has rice flour in it. For my family, it is important to stay away from most grains. We occasionally use corn. The All Purpose flour has bean flours and sorghum blended in. Even this blend can be a bit heavy for baking. To make it work I usually blend a few different “flours” together. Typically for cookies I use a blend of these three:

Bob’s Red Mill Gluten Free All Purpose Flour
Tapioca Starch
Cornstarch

Sometimes the amount of flour in a recipe can be divided into three equally. When it can’t be divided equally I usually assign the larger measure to the all purpose flour. You may also want to do this if you want to keep your starch intake low. However, please keep in mind that if you want to make something really delicious and satisfying you will have to, in most cases, incorporate some starch. If you are really opposed to using starches, then I strongly suggest sticking to recipes that are already gluten free, tried, and tested.

The other very important consideration is using Xanthan Gum. This is very, very important. Without it, your cookies won’t make it off the cooking sheet in one piece. (A discussion about Xanthan Gum will be featured soon. Stay tuned!) The general guideline for cookies is ¼ teaspoon for every cup of “flour” you use. This includes starches. So let’s say that the recipe calls for 3 cups of flour. You would use 1 cup of each: Bob’s …All Purpose Flour, Tapioca Starch, Cornstarch + ¾ teaspoon Xanthan Gum.

For most cookie recipes these are the only changes you need to make. When vanilla is called for, I like to use Simply Organic vanilla. This brand is definitely gluten free. Also be sure to use ingredients that you know to be gluten free. For baking power or baking soda, Bob’s Red Mill Brand is a good choice. Do not forget to use Parchment Paper. This makes baking successful and enjoyable.


So are you ready to get started? Try out my chocolate chocolate chip recipe. This is a variation of the Nestle Toll House cookie recipe - always a crowd pleaser. Stayed tuned for more tips and recipe conversions. If you would like for me to help you convert a recipe to make it gluten free, please post your request in the comment section. Remember to include your e-mail address. 

Happy Gluten Free Eating!

Best gluten free rolls ever!

Sandwich Rolls Gluten Free
by: Melinda Cruz

Cook Time: 15 to 20 minutes
Yield: 4 to 5 rolls

Ingredients:
1/2 cup Milk
1/4 cup Water
4 Tbs Butter
1 Tbs Sugar, honey, agave nectar, or other sweetner
1 Egg
1 cup All Purpose Flour (Bob's Red Mill Gluten Free)
3/4 cup Tapioca starch
1/2 cup Cornstarch
1/2 Packet of Active Yeast
1 tsp Xanthan gum
3/4 tsp Salt

Directions:
Heat milk, water, butter, and sugar until butter is melted. Allow to cool until temperature reads 120 degrees. Whisk in egg.

Notes:
Combine all dry ingredients. Then add the liquid mixture to the dry. Mix thoroughly. Scoop out about 1/2cup of dough onto parchment lined cookie sheet for each roll. Leave a little space between each roll.
* Optional:  brush with egg wash and add sesame seeds for an authentic sandwich roll
* Note: You can allow them to rise in a warm place for a 1/2 hour. However, I've done these with & without rising. They came out great both ways. I suggest to let them rise if you have the time. It will allow the yeast to get the memo to do its thing!
Bake at 400 degrees for about 15 to 20 minutes depending on the size of the rolls.  You know they are done when you tap them and they sound hollow.

Free Eatz Food For Thought


Homemade Gluten Free Cooking


How to flavor your homemade yogurt


If you have used the exact measurements from the recipe on this blog, then all you have to do is simply stir in:


  • 1 Tsp of Gluten Free Vanilla Extract (The brand Simply Organic makes a great Vanilla Extract. )


Want wholesome sweetness?


  • Add about 2 tablespoons of REAL Maple Syrup – Grade A or B


For other flavors or to add fruit smoothly, just add your yogurt to a blender with the desired fruit – strawberries, blueberries, bananas… and blend until smooth. To avoid making your yogurt to thin when adding fruit, you may want to strain your yogurt first. (See “Tips” for the how to on this) Store in your container for easy access to a healthy breakfast or snack anytime.

Chocolate - Need I Say More?

 
Have a craving for something super chocolately? Then this recipe will be sure to please! Be careful, these cookies are not for those who "like" chocolate, they are for those who "LOVE" it.
 
 Click on Link Below to get the Recipe and See the How To Video
 

I Had A Taste for Anise Cookies...


Anise Cookies

Ingredients

1 Cup Gluten Free All Purpose Flour

2/3 Cup Tapioca Starch (or Cornstarch)

¼ Tsp Xanthan Gum

1/2 Tsp Baking Powder

1/2 Tsp salt

2 Tsp ground anise seeds

4 Large Eggs, room temperature

1 Cup Granulated Sweetner (Sugar, Raw Cane, Turbinado, …)

Directions – Before you start turn your oven on to 350 Degrees

Measure out dry ingredients into a medium size bowl:   

GF All Purpose Flour, Tapioca Starch, Xanthan Gum, Baking Powder, Salt, & Ground Anise Seeds – Stir to mix through

Add the four eggs to a mixing bowl and with a stand mixer – mix for 3 to 5 minutes. Then while mixing slowly add the Sweetner and mix for another 2 to 3 minutes.
Now Add the Flour Mixture (make sure you scrape down bowl and get every bit of the flour mixture into the egg sugar blend.

Stir until well blended.


Getting the batter on the cookie sheet: 1st it is a good idea to put down a layer of good parchment paper. This will make this cookie making experience much more pleasant.


Option 1: You can pipe it on by putting the batter into a disposable storage bag, snipping off a corner, and piping small circles about an inch or more apart.
Option 2: Spoon batter onto parchment paper lined cookie sheet. Make small circles about an inch or so apart.

Bake at 350 Degrees for 6 to 8 minutes. Allow to cook for 2 minutes and transfer to a cooling rack to finish cooling. Then enjoy!


Bolognese


A quick, delicious, simple, yet nutritious meal! Follow these 10 EASY steps:


 Ingredients:
Corn Pasta ½ Package (about 6 oz.)
Ground Beef 1 lbs
Prepared Marinara Sauce (Homemade Leftover or Store Bought)
Sea Salt
Fresh Ground Black Pepper
Dried Parsley
Dried Basic
Powdered Garlic
Powdered Onion
Grated Parmesan Cheese (Optional)

Step 1: Fill a pot with 3-4 quarts of water and put on a burner and turn it on medium –  
            high.

Step 2: Now turn your good size sauté pan on medium high

Step 3: Add 1 Tablespoons of oil

Step 4: Add your ground beef to the sauté pan

Step 5: Stir and break it up as it browns – turn your heat down a bit

Step 6: Your water in the other pot should be boiling by now. Pour 1-2 tablespoon of salt to your water. Add your desired port of corn pasta to the pot of water and stir immediately. (Stir from time to time to prevent sticking until you strain it)


Step 7: Add the following spices to the sautéing beef: Sea Salt, Fresh Cracked Black Pepper, 1 Tsp. of Parsley & Basil Each, ½ Tsp. Garlic & Onion Powder Each and stir until mixed through.


Step 8: Add prepared marinara sauce to beef, turn down temperature to a low simmer


Step 9: Once the corn pasta is cooked to desired consistency drain and add to Beef & Marinara Sauce. Stir together and let it cook for a minute or two.


Step 10: Serve up and enjoy!!!!!!!


Corn Pasta


Corn pasta is a wonderful alternative to regular wheat pasta. It tastes very similar, if not better. For years, the only choice for those who wanted pasta but couldn’t have the regular thing, was to have brown rice pasta or some other grain pasta. Let’s face it, they just don’t cut it. Not only is the taste very different, but the texture isn’t the same and cooking it can be tricky. Not so with corn pasta.  

I find it wonderful and refreshing that most everyday grocery stores (at least in my area) are now stocking it on their shelves. It is nice to see the awareness and also makes me believe that there are many opting for the Gluten Free Life!!!! 

The variety of meals that can be made with corn pasta are as bountiful as with ordinary spaghetti, penne, fusilli (rotini), elbows, fettuccini and more….  

Trader Joes in the South Jersey area offers spaghetti and penne corn pasta at a great price of under $2 per package.
 
Whole Foods carries the Deboles brand. The product is good quality - about the same as others. But the brand's price is higher than most. Not sure if it is worth the extra "dough" :) (get it? ).

Shoprite grocery stores has a great brand that has every shape you can think of in corn pasta – Sam Mills. These are all for under $2. Amazon has them at a reasonable price, but they sell them by the 6’s. (If you love Italian food as much as I do – that is no problem to use those up!)

If you are in the Northeast, then you have Joblot stores that carry that same brand for the lowest price I have ever seen.
 
                                                               
Tips to successful Corn Pasta

-          Bring water to a boil before putting pasta in pot

-          Use plenty of salt to flavor the water – this brings out the flavor of the pasta nicely

-          IMMEDIATELY after putting the pasta in the boiling water – STIR and stir frequently (more often than with wheat pasta) to prevent sticking

-          To reheat corn pasta sprinkle some water on top for oven warming or for stove top warming cover the bottom of a pot with water and add the leftover pasta then warm.


Yucca Anyone?


Singing the praises of Yucca once again!
Last night I made this delicious yucca broccoli cheese casserole.


To make this you will need:

Frozen Yucca
2 Heads of Broccoli
2 Cups of Extra Sharp Cheddar Cheese
1 to 1 ½ Cups of Milk
1 Stick of Butter
Salt
Pepper


Start out with frozen yucca – the same kind recommended in my other post for yucca fries. Boil these for about 20 minutes. Take out of the water with a slotted spoon – keep the water boiling and add washed broccoli.

Back to the yucca: Add a couple of pads of butter, salt & pepper. Then whip with mixers while adding milk until you get the consistency that you like.  
                                            

You will need a casserole dish to accommodate the amount of yucca you used. (I used about 10 pieces of yucca or so & 1 ½ heads of broccoli with an 8 x 12 casserole dish.)

Add ¾ of the whipped yucca and spread. Add a layer of cheese. On top of that pile your broccoli. Dollop the rest of the yucca on top followed by a generous layer of cheese. Bake at 400 Degrees for 20-30 min. Enjoy!

Yucca Fries


Yucca Fries
(Yucca -Also known as Cassava Root)

Most supermarkets have a “Spanish” food section in the frozen food area. Look for Goya Yucca. It comes in 5lb bags and 2 lb bags.

You put a couple of pieces in hot water and boil them for 15-20 minutes. Drain them off and on your cutting board cut them into “French fry” slices. Heat some oil – my favorite is Grapeseed- and when it is hot enough slide the “French Fries” on in and cook until golden.

Using a slotted spoon, scoop them out and onto a paper towel lined dish. Sprinkle with course sea salt and what a yummy side dish or snack.


Yucca has some great nutritional benefits. My favorite is that it reduces inflammation!

Fresh yucca is available as oppose to frozen. However, fresh is difficult to deal with and if not cared for properly, has a very bitter aftertaste.

Hope you will try these and join me in the love of Yucca Fries!!!!!!!!!